使用 modelscope-studio 构建你的 Gradio 应用
modelscope-studio是一个基于 Gradio 的三方组件库,它可以为开发者提供更定制化的界面搭建能力和更丰富的组件使用形式。

modelscope-studio是一个基于 Gradio 的三方组件库,它可以为开发者提供更定制化的界面搭建能力和更丰富的组件使用形式。
文档 & Demo:
-
中文版: https://modelscope.cn/studios/modelscope/modelscope-studio
-
英文版: https://huggingface.co/spaces/modelscope/modelscope-studio
在原有 Gradio 组件之上,modelscope-studio提供了多种基础组件来辅助开发者优化界面布局,如div、span、text等前端的基本元素,并且还集成了 Ant Design 等著名的前端组件库来帮助开发者快速构建更加美观的界面。
现有案例:
-
Qwen2.5-Coder-Artifacts:
https://modelscope.cn/studios/Qwen/Qwen2.5-Coder-Artifacts
-
OpenR 推理:
https://modelscope.cn/studios/modelscope/OpenR_Inference
-
QVQ-72B-preview:
https://modelscope.cn/studios/Qwen/QVQ-72B-preview
01.下载
由于 Gradio 在 4.0 版本后才支持自定义组件,在使用时请确保 Gradio 版本大于等于 4.0。
pip install modelscope_studio02.使用案例
import gradio as gr

import modelscope_studio.components.antd as antd
import modelscope_studio.components.base as ms

with gr.Blocks() as demo:
    with ms.Application():
        with antd.ConfigProvider():
            with ms.AutoLoading():
                with antd.Flex(vertical=True, gap="small"):
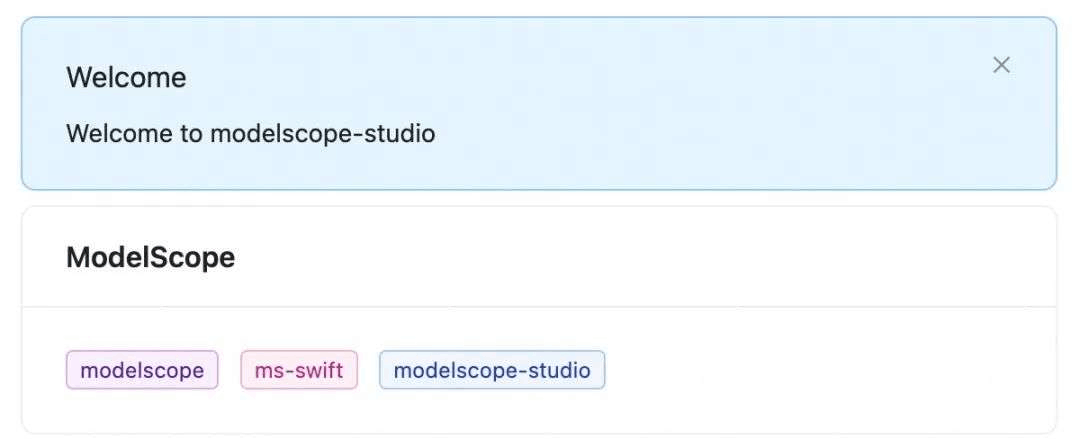
                    antd.Alert(type="info",
                               message="Welcome",
                               closable=True,
                               description="Welcome to modelscope-studio")
                    with antd.Card(title="ModelScope"):
                        antd.Tag("modelscope", color="purple")
                        antd.Tag("ms-swift", color="magenta")
                        antd.Tag("modelscope-studio", color="geekblue")

demo.queue().launch()

03.功能特性
在使用上,modelscope-stduio几乎支持了 Ant Design 中的所有组件功能,包括多语言、主题配置、 组件上下文联动、自定义布局等。
使用插槽自定义布局
与 Gradio 本身的布局机制不同,为了实现更自由的自定义布局,modelscope-studio为开发者提供了Slot(插槽)组件。
比如在 Ant Design 中,有一些类型为ReactNode的属性(可以简单理解为它们接收的参数是一个个组件),这些属性就无法直接通过 Python 传入,只能通过Slot组件实现。
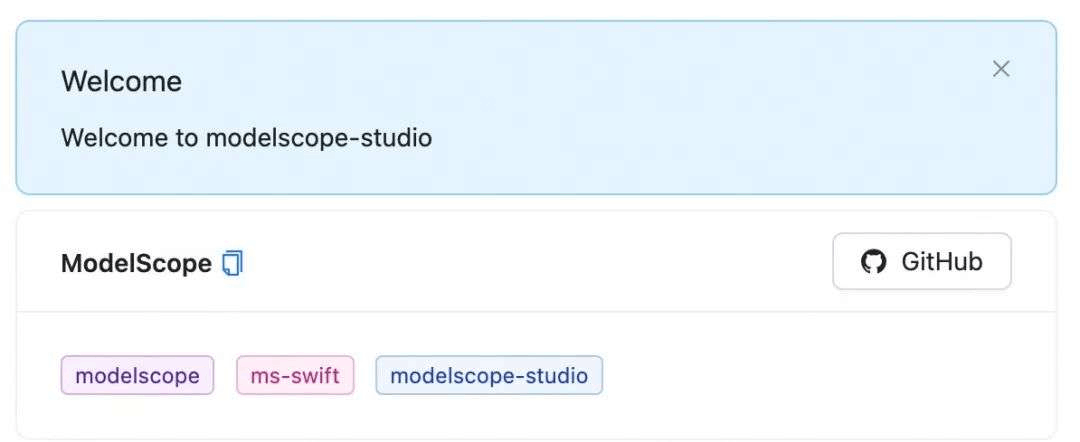
在上面的示例中,我们希望给 Card 的顶部添加一些额外的样式:
with antd.Card():
    with ms.Slot("title"):  # 与 card 的属性名对应,会覆盖原有 card 的 title 属性
        antd.Typography.Text("ModelScope",
                             strong=True,
                             copyable=True)
    with ms.Slot("extra"): # card 的另一个属性,为顶部右侧添加内容
        with antd.Button(
                href=
                "https://github.com/modelscope/modelscope-studio",
                href_target="_blank"):
            ms.Text("GitHub")
            with ms.Slot("icon"):
                antd.Icon("GithubOutlined")
    antd.Tag("modelscope", color="purple")
    antd.Tag("ms-swift", color="magenta")
    antd.Tag("modelscope-studio", color="geekblue")

通过Slot,我们就可以更加自由地对页面进行调整了!
集成其他 Gradio 组件
modelscope-studio对自身的定位主要是在页面布局和组件的灵活性上,如果某些功能modelscope-studio中的组件无法实现,开发者也可以很轻松地嵌入其他的 Gradio 组件,并且仍然可以和modelscope-studio一起搭配使用。
修改一下上面的代码,我们在卡片右上角加入 Gradio 自带的按钮:
with ms.Slot("extra"):
    gr.Button("Gradio Button", variant="primary")

    with antd.Button(
            href=
            "https://github.com/modelscope/modelscope-studio",
            elem_style=dict(marginLeft=8),
            href_target="_blank"):
        ms.Text("GitHub")
        with ms.Slot("icon"):
            antd.Icon("GithubOutlined")
组件上下文联动
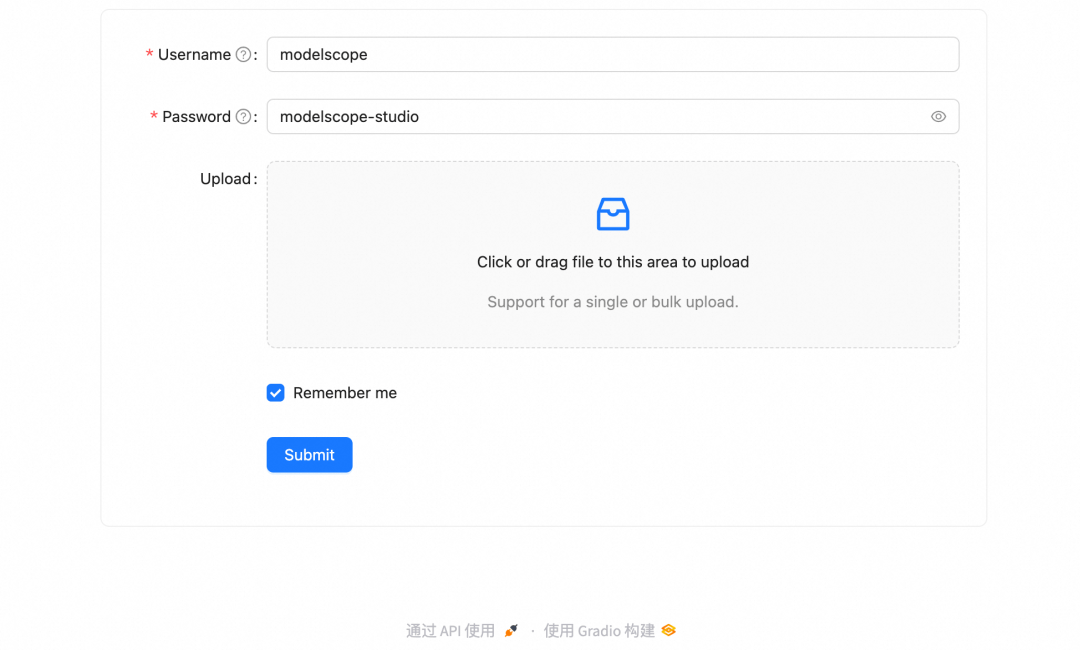
在modelscope-studio中,也支持不同组件之间的联动效果,以常见的表单提交场景为例:
import gradio as gr

import modelscope_studio.components.antd as antd
import modelscope_studio.components.base as ms


def on_submit(_form):
    print(_form)  # the Form Component will automatically collect the form data


with gr.Blocks() as demo:
    with ms.Application():
        with antd.ConfigProvider():
            with antd.Card(elem_style=dict(width=800, margin="0 auto")):
                with antd.Form(variant="outlined",
                               label_col=dict(span=4),
                               wrapper_col=dict(span=20)) as form:
                    with antd.Form.Item(form_name="username",
                                        label="Username",
                                        tooltip="This is a required field",
                                        rules=[{
                                            "required":
                                            True,
                                            "message":
                                            'Please input your username!'
                                        }]):
                        antd.Input()
                    with antd.Form.Item(form_name="password",
                                        label="Password",
                                        tooltip="This is a required field",
                                        rules=[{
                                            "required":
                                            True,
                                            "message":
                                            'Please input your password!'
                                        }]):
                        antd.Input.Password()
                    with antd.Form.Item(form_name="files", label="Upload"):
                        with antd.Upload.Dragger():
                            with ms.Div(elem_style=dict(fontSize=40,
                                                        color="#1677ff")):
                                antd.Icon("InboxOutlined")
                            antd.Typography.Paragraph(
                                "Click or drag file to this area to upload")
                            antd.Typography.Paragraph(
                                "Support for a single or bulk upload.",
                                type="secondary")

                    with antd.Form.Item(
                            wrapper_col=dict(offset=4, span=20),
                            form_name="remember",
                            value_prop_name="checked",
                    ):
                        with antd.Checkbox():
                            ms.Text("Remember me")
                    with antd.Form.Item(wrapper_col=dict(offset=4, span=20)):
                        submit_btn = antd.Button("Submit",
                                                 type="primary",
                                                 html_type="submit")
                # 当 html_type 为 submit 的按钮被点击时触发
                form.finish(on_submit, inputs=[form])


demo.launch()
点击的打印结果为:
{'username': 'modelscope', 'password': 'modelscope-studio', 'remember': True}在这个示例中,modelscope-studio支持开发者通过上下文统一收集表单项,不用过度关心 inputs 的填写,非常方便。(自动收集只有 Ant Design 提供的表单组件才能触发哦)
自定义主题与多语言
通过为antd.ConfigProvider组件传递theme和locale等参数实现自定义主题和多语言。
import gradio as gr

import modelscope_studio.components.antd as antd
import modelscope_studio.components.base as ms

default_locale = "en_US"
default_direction = 'ltr'
default_color = "#816DF8"
with gr.Blocks() as demo:
    with ms.Application():
        with antd.ConfigProvider(
                locale=default_locale,
                direction=default_direction,
                theme=dict(token=dict(
                    colorPrimary=default_color))) as config_provider:
            with antd.Card():
                with ms.Div(elem_style=dict(marginBottom=16)):
                    ms.Span("change locale of components:",
                            elem_style=dict(marginInlineEnd=16))
                    with antd.Radio.Group(value=default_locale) as locale:
                        with antd.Radio("en_US"):
                            ms.Text("English")
                        with antd.Radio("zh_CN"):
                            ms.Text("中文")
                        with antd.Radio("ja_JP"):
                            ms.Text("日本語")
                        with antd.Radio("ko_KR"):
                            ms.Text("한국어")
                    with antd.Space(wrap=True):
                        antd.DatePicker()
                        antd.DatePicker.RangePicker()
                        antd.TimePicker()
                        antd.TimePicker.RangePicker()
                with ms.Div(elem_style=dict(marginBottom=16)):
                    ms.Span("change direction of components:",
                            elem_style=dict(marginInlineEnd=16))
                    with antd.Radio.Group(
                            value=default_direction) as direction:
                        with antd.Radio.Button("ltr"):
                            ms.Text("LTR")
                        with antd.Radio.Button("rtl"):
                            ms.Text("RTL")
                    antd.Input(placeholder="do something...",
                               elem_style=dict(marginTop=8))
                with ms.Div(elem_style=dict(marginBottom=16)):
                    ms.Span("change theme of components:",
                            elem_style=dict(marginInlineEnd=16))
                    color = antd.ColorPicker(value=default_color)

                    antd.Button("Primary Button",
                                type="primary",
                                block=True,
                                elem_style=dict(marginTop=8))

        locale.change(fn=lambda _locale: gr.update(locale=_locale),
                      inputs=[locale],
                      outputs=[config_provider])
        direction.change(fn=lambda _direction: gr.update(direction=_direction),
                         inputs=[direction],
                         outputs=[config_provider])
        color.change(fn=lambda _color: gr.update(theme=dict(token=dict(
            colorPrimary=_color))),
                     inputs=[color],
                     outputs=[config_provider])

demo.launch()

点击链接阅读原文:OpenR 推理
更多推荐
 已为社区贡献634条内容


所有评论(0)