

再次刷新端侧多模态天花板,面壁「小钢炮」 MiniCPM-V 2.6 模型重磅上新!
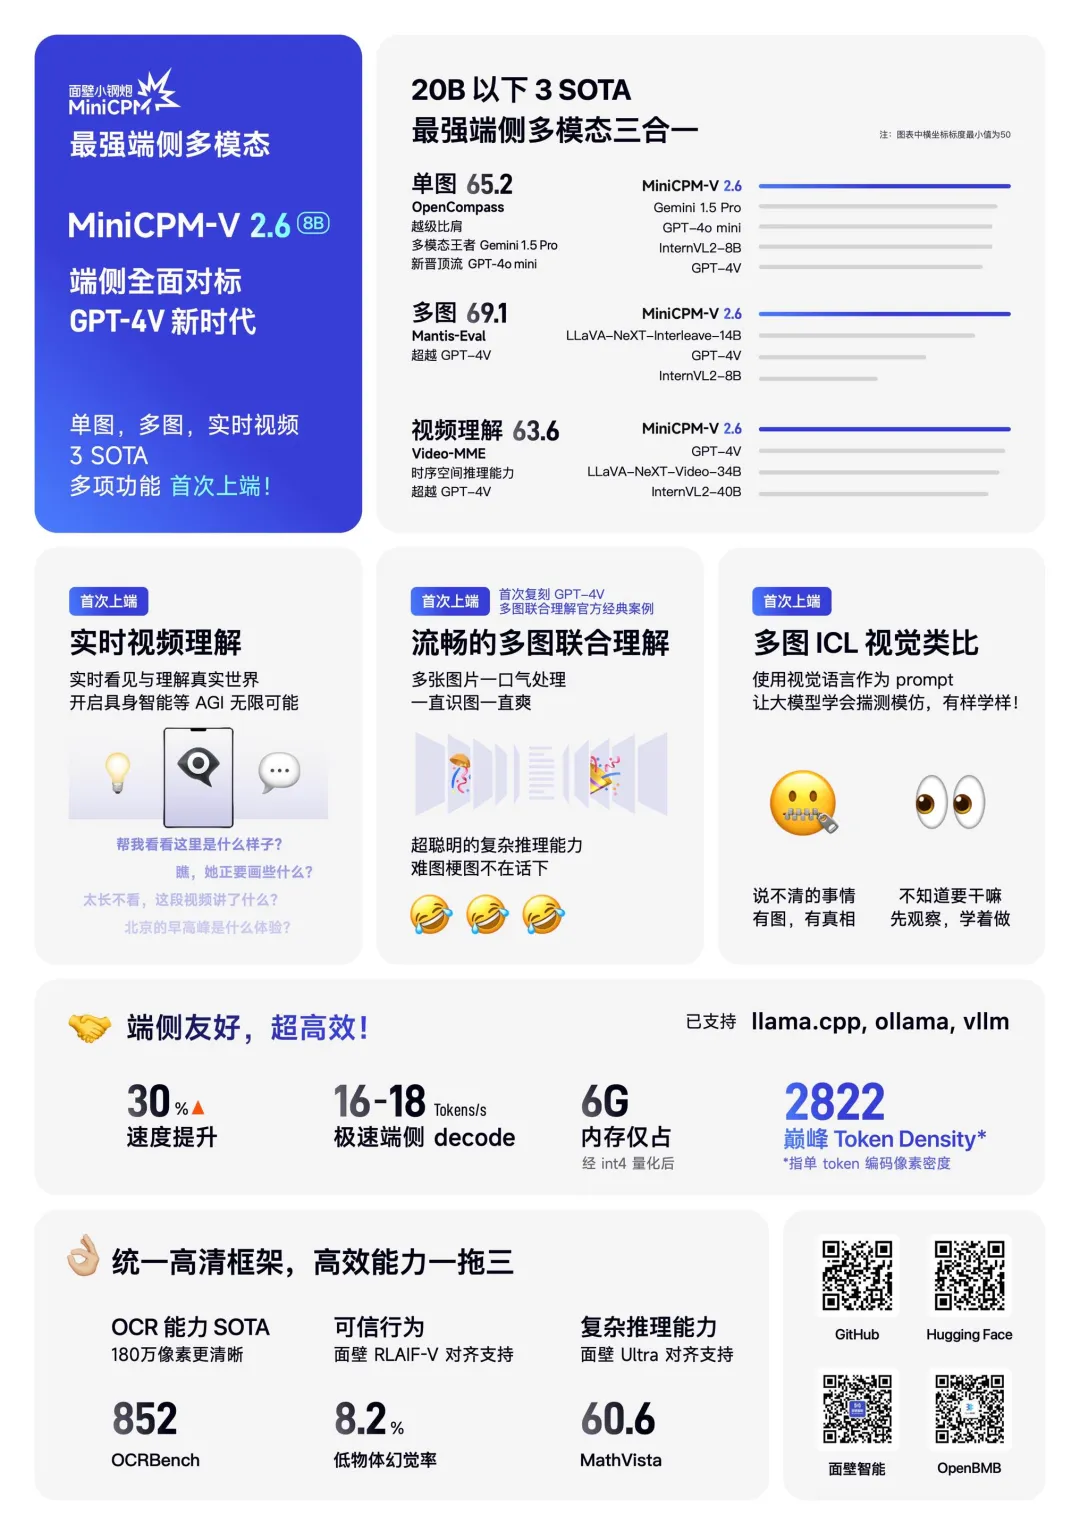
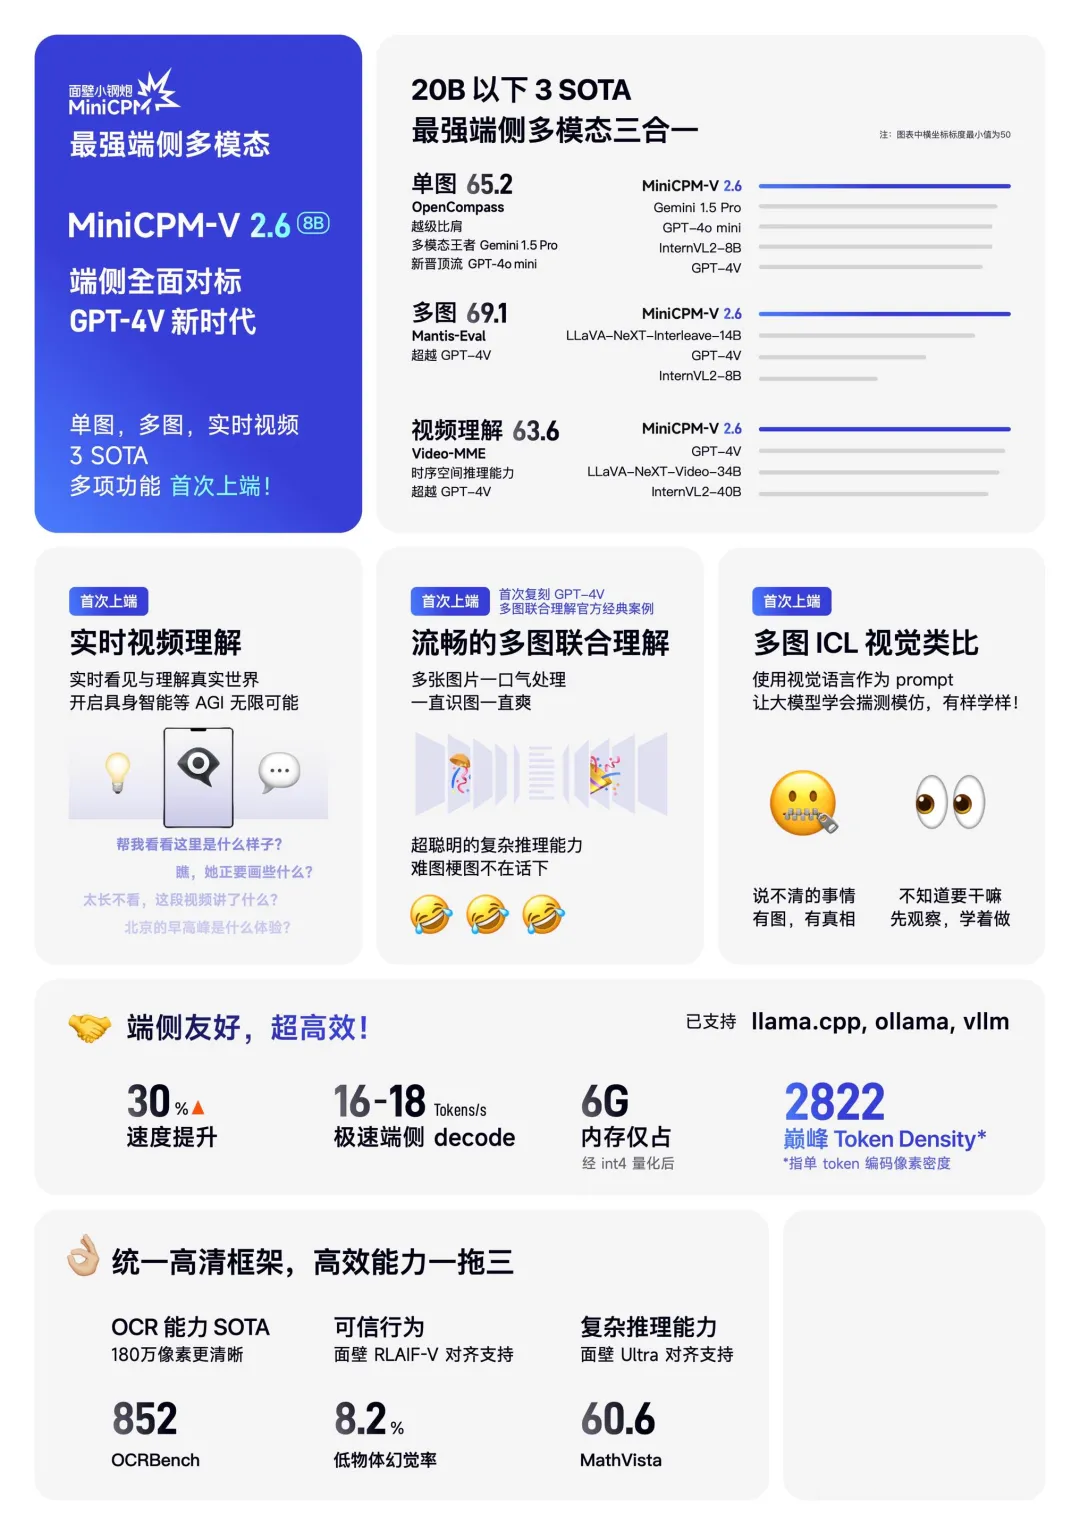
该模型基于 SigLip-400M 和 Qwen2-7B 构建,仅 8B 参数,取得 20B 以下单图、多图、视频理解 3 SOTA 成绩,一举将端侧AI多模态能力拉升至全面对标 GPT-4V 水平。
更有多项功能首次上「端」:小钢炮一口气将实时视频理解、多图联合理解、多图 ICL 等能力首次搬上端侧多模态模型,更接近充斥着复杂、模糊、连续实时视觉信息的多模态真实世界,更能充分发挥端侧 AI 传感器富集、贴近用户的优势。
MiniCPM-V 2.6 开源地址:
GitHub:
🔗 https://github.com/OpenBMB/MiniCPM-V
ModelScope:
🔗 https://modelscope.cn/models/OpenBMB/MiniCPM-V-2_6
MiniCPM 系列开源地址:
🔗 https://github.com/OpenBMB/MiniCPM
魔搭社区最佳实践
模型下载
模型repo下载:
modelscope download --model=OpenBMB/MiniCPM-V-2_6 --local_dir ./MiniCPM-V-2_6单文件GGUF下载:
modelscope download --model=OpenBMB/MiniCPM-V-2_6-gguf --local_dir ./ ggml-model-Q4_K_M.gguf模型推理
单图推理:
# test.py
import torch
from PIL import Image
from modelscope import AutoModel, AutoTokenizer

model = AutoModel.from_pretrained('OpenBMB/MiniCPM-V-2_6', trust_remote_code=True,
    attn_implementation='sdpa', torch_dtype=torch.bfloat16) # sdpa or flash_attention_2, no eager
model = model.eval().cuda()
tokenizer = AutoTokenizer.from_pretrained('OpenBMB/MiniCPM-V-2_6', trust_remote_code=True)

image = Image.open('image.png').convert('RGB')
question = 'What is in the image?'
msgs = [{'role': 'user', 'content': [image, question]}]

res = model.chat(
    image=None,
    msgs=msgs,
    tokenizer=tokenizer
)
print(res)

## if you want to use streaming, please make sure sampling=True and stream=True
## the model.chat will return a generator
res = model.chat(
    image=None,
    msgs=msgs,
    tokenizer=tokenizer,
    sampling=True,
    stream=True
)

generated_text = ""
for new_text in res:
    generated_text += new_text
    print(new_text, flush=True, end='')
多图理解:
import torch
from PIL import Image
from modelscope import AutoModel, AutoTokenizer

model = AutoModel.from_pretrained('OpenBMB/MiniCPM-V-2_6', trust_remote_code=True,
    attn_implementation='sdpa', torch_dtype=torch.bfloat16) # sdpa or flash_attention_2, no eager
model = model.eval().cuda()
tokenizer = AutoTokenizer.from_pretrained('OpenBMB/MiniCPM-V-2_6', trust_remote_code=True)

image1 = Image.open('image1.jpg').convert('RGB')
image2 = Image.open('image2.jpg').convert('RGB')
question = 'Compare image 1 and image 2, tell me about the differences between image 1 and image 2.'

msgs = [{'role': 'user', 'content': [image1, image2, question]}]

answer = model.chat(
    image=None,
    msgs=msgs,
    tokenizer=tokenizer
)
print(answer)
视频理解:
import torch
from PIL import Image
from modelscope import AutoModel, AutoTokenizer
from decord import VideoReader, cpu    # pip install decord

params={}

model = AutoModel.from_pretrained('OpenBMB/MiniCPM-V-2_6', trust_remote_code=True,
    attn_implementation='sdpa', torch_dtype=torch.bfloat16) # sdpa or flash_attention_2, no eager
model = model.eval().cuda()
tokenizer = AutoTokenizer.from_pretrained('OpenBMB/MiniCPM-V-2_6', trust_remote_code=True)

MAX_NUM_FRAMES=64

def encode_video(video_path):
    def uniform_sample(l, n):
        gap = len(l) / n
        idxs = [int(i * gap + gap / 2) for i in range(n)]
        return [l[i] for i in idxs]

    vr = VideoReader(video_path, ctx=cpu(0))
    sample_fps = round(vr.get_avg_fps() / 1)  # FPS
    frame_idx = [i for i in range(0, len(vr), sample_fps)]
    if len(frame_idx) > MAX_NUM_FRAMES:
        frame_idx = uniform_sample(frame_idx, MAX_NUM_FRAMES)
    frames = vr.get_batch(frame_idx).asnumpy()
    frames = [Image.fromarray(v.astype('uint8')) for v in frames]
    print('num frames:', len(frames))
    return frames

video_path="car.mp4"
frames = encode_video(video_path)
question = "Describe the video"
msgs = [
    {'role': 'user', 'content': frames + [question]},
]

# Set decode params for video
params["use_image_id"] = False
params["max_slice_nums"] = 2 # 如果cuda OOM且视频分辨率大于448*448 可设为1

answer = model.chat(
    image=None,
    msgs=msgs,
    tokenizer=tokenizer,
    **params
)
print(answer)
测试了一下效果:

视频描述:
这个视频展示了一辆白色四门轿车在一条蜿蜒的土路上行驶,这条土路位于一个山地景观中。车辆从后方拍摄,逐渐远离观众,沿着道路向上行驶。天空晴朗,偶尔飘过几朵云彩,暗示着天气条件良好。周围的地形主要是干燥的土壤和稀疏的植被,包括一些针叶树,表明这是一个森林地区,可能是一个山区。远处可以看到起伏的群山和部分被树木遮挡的建筑或结构,显示出人类居住的迹象。阳光照射在场景上,投射出柔和的阴影,突出了车辆的轮廓和道路的质感。整个视频传达出一种宁静和孤独的感觉,强调了自然环境与车辆之间的对比。
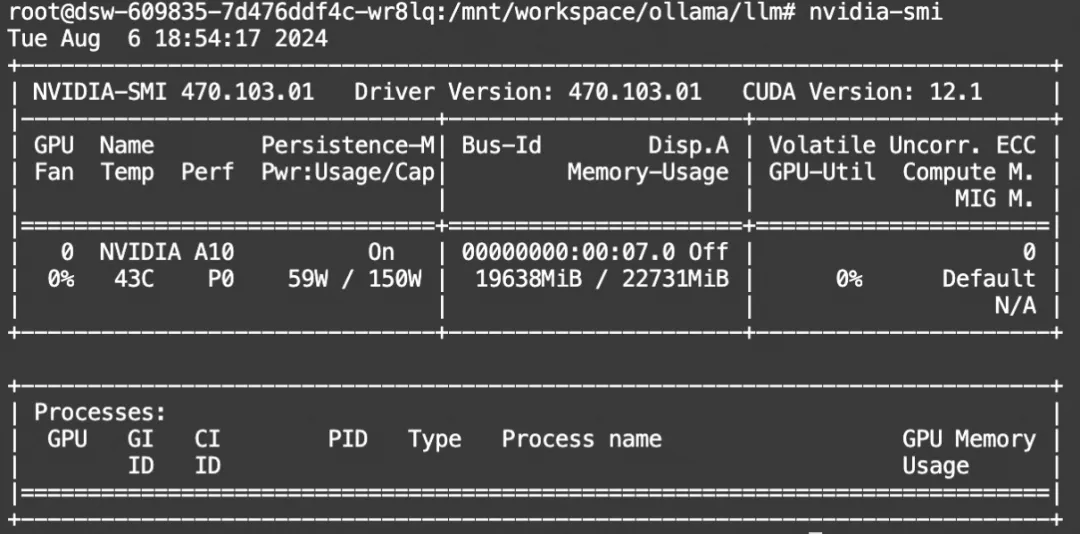
显存占用:

模型微调
我们使用swift对MiniCPM-V 2.6进行微调。swift是魔搭社区官方提供的大模型与多模态大模型微调推理框架。
swift开源地址:https://github.com/modelscope/swift
通常,多模态大模型微调会使用自定义数据集进行微调。在这里,我们将展示可直接运行的demo。
在开始微调之前,请确保您的环境已准备妥当。
git clone https://github.com/modelscope/swift.git
cd swift
pip install -e .[llm]
图片微调
我们使用 coco-en-mini 数据集进行微调,该数据集的任务是对图片内容进行描述。您可以在 modelscope 上找到该数据集:https://modelscope.cn/datasets/modelscope/coco_2014_caption/summary
# 默认会将lora_target_modules设置为llm和resampler所有的linear
CUDA_VISIBLE_DEVICES=0,1,2,3 NPROC_PER_NODE=4 swift sft \
  --model_type minicpm-v-v2_6-chat \
  --model_id_or_path OpenBMB/MiniCPM-V-2_6 \
  --sft_type lora \
  --dataset coco-en-mini#20000 \
  --deepspeed default-zero2
如果要使用自定义数据集,只需按以下方式进行指定:
  --dataset train.jsonl \
  --val_dataset val.jsonl \
自定义数据集支持json和jsonl样式,以下是自定义数据集的样例:
{"query": "<image>55555", "response": "66666", "images": ["image_path"]}
{"query": "eeeee<image>eeeee<image>eeeee", "response": "fffff", "history": [], "images": ["image_path1", "image_path2"]}
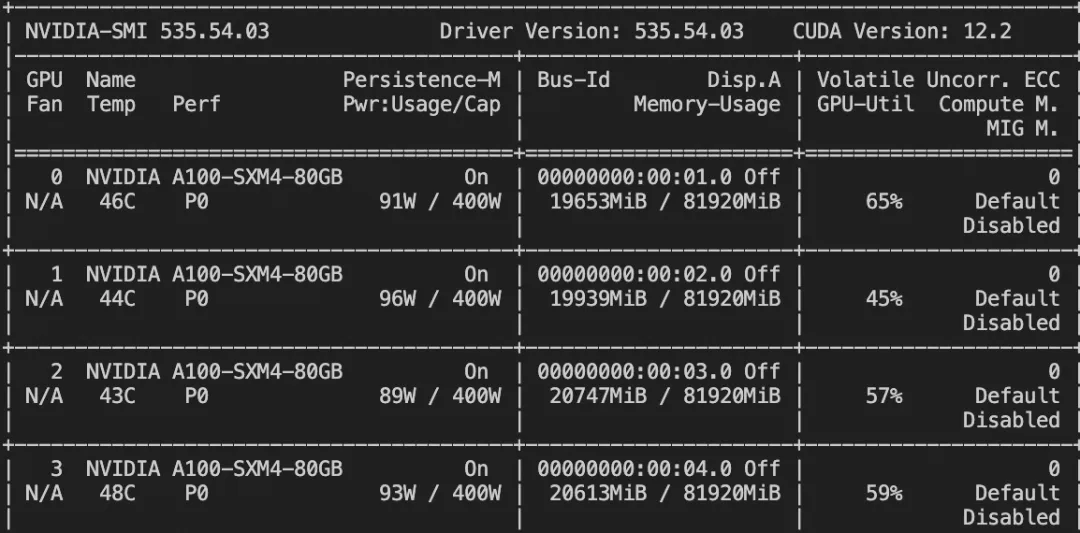
{"query": "EEEEE", "response": "FFFFF", "history": [["query1", "response2"], ["query2", "response2"]], "images": []}显存占用:

微调后推理脚本如下:
# 如果要全量测试请设置: `--show_dataset_sample -1`
CUDA_VISIBLE_DEVICES=0 swift infer \
--ckpt_dir output/minicpm-v-v2_6-chat/vx-xxx/checkpoint-xxx \
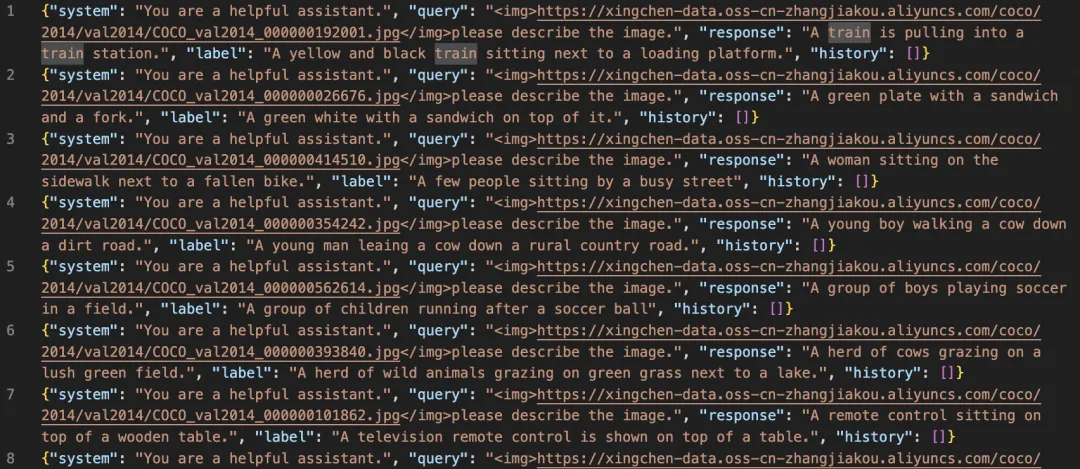
--load_dataset_config true --merge_lora true微调后模型对验证集进行推理的示例(时间原因,只训练了300个step):

视频微调
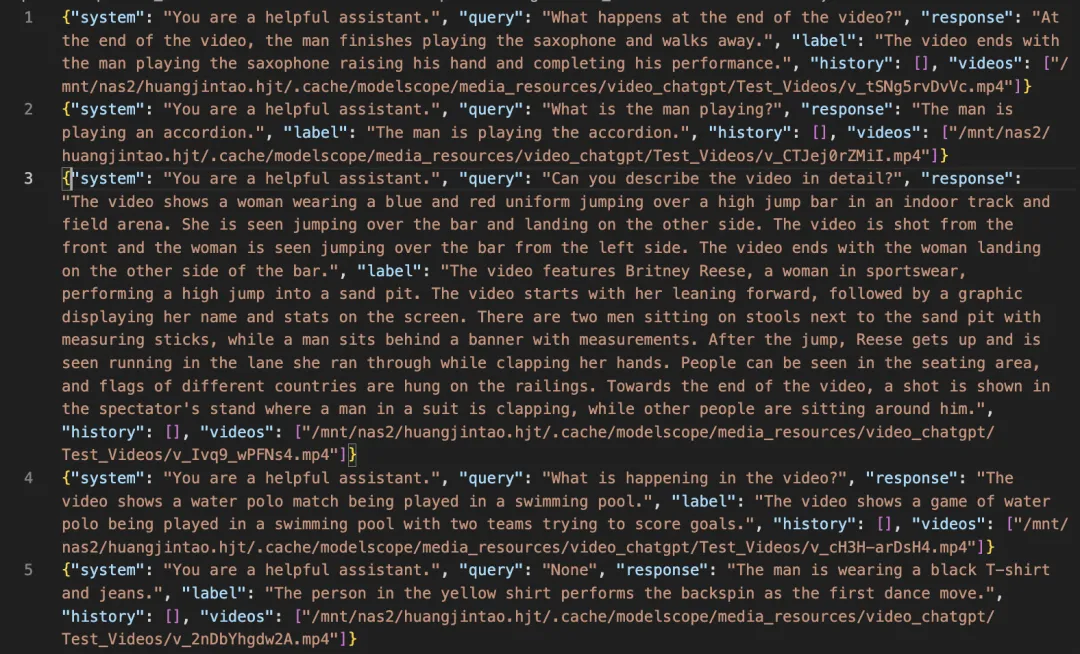
我们使用 video-chatgpt 数据集进行微调,该数据集的任务是对视频内容进行描述。您可以在 modelscope 上找到该数据集:https://modelscope.cn/datasets/swift/VideoChatGPT
CUDA_VISIBLE_DEVICES=0,1,2,3 NPROC_PER_NODE=4 swift sft \  --model_type minicpm-v-v2_6-chat \
  --model_id_or_path OpenBMB/MiniCPM-V-2_6 \
  --sft_type lora \
  --dataset video-chatgpt \
  --deepspeed default-zero2
自定义数据集支持json和jsonl样式,以下是自定义数据集的样例:
{"query": "<video>55555", "response": "66666", "videos": ["video_path"]}
{"query": "eeeee<video>eeeee<video>eeeee", "response": "fffff", "history": [], "videos": ["video_path1", "video_path2"]}
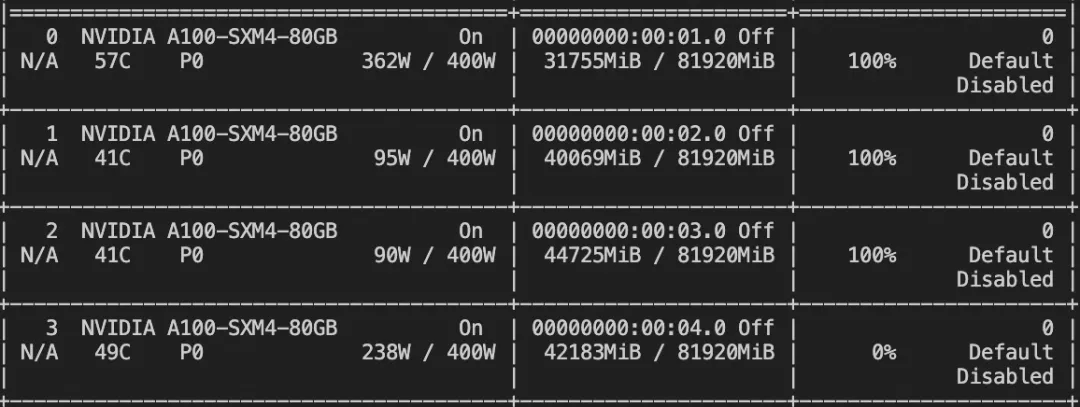
{"query": "EEEEE", "response": "FFFFF", "history": [["query1", "response2"], ["query2", "response2"]], "videos": []}显存占用:

微调后推理脚本如下:
CUDA_VISIBLE_DEVICES=0 swift infer \
    --ckpt_dir output/minicpm-v-v2_6-chat/vx-xxx/checkpoint-xxx \
    --load_dataset_config true --merge_lora true
微调后模型对验证集进行推理的示例(时间原因,只训练了50个step):

模型部署
本文推荐,使用vLLM搭建MiniCPM的OpenAI格式api
使用git下载安装vllm
git clone https://github.com/vllm-project/vllm.git
cd vllm
pip install e .
命令行启动vllm服务
llm serve ./MiniCPM-V-2_6/ --dtype auto --max-model-len 2048 --gpu_memory_utilization 1 --trust-remote-code 使用OAI接口调用vllm的http服务
from openai import OpenAI
openai_api_key = "None" # your api key set in launch server
openai_api_base = "http://localhost:8000/v1" # http id
client = OpenAI(
    api_key=openai_api_key,
    base_url=openai_api_base,
)

chat_response = client.chat.completions.create(
    model="./MiniCPM-V-2_6/", # model_local_path or huggingface id
    messages=[{
        "role": "user",
        "content": [
            # NOTE: 使用图像令牌 <image> 的提示格式是不必要的,因为提示将由API服务器自动处理。
            # 由于提示将由API服务器自动处理,因此不需要使用包含 <image> 图像令牌的提示格式。
            {"type": "text", "text": "请描述这张图片"},
            {
                "type": "image_url",
                "image_url": {
                    "url": "https://air-example-data-2.s3.us-west-2.amazonaws.com/vllm_opensource_llava/stop_sign.jpg",
                },
            },
        ],
    }],
    extra_body={
        "stop_token_ids": [151645, 151643]
    }
)
print("Chat response:", chat_response)
print("Chat response content:", chat_response.choices[0].message.content)


 已为社区贡献663条内容

所有评论(0)